DDEV Installation
Once you’ve installed a Docker provider, you’re ready to install DDEV!
macOS
Homebrew
Homebrew is the easiest and most reliable way to install and upgrade DDEV:
Install Script
The install script is another option. It downloads, verifies, and sets up the ddev binary:
Linux
Locally-trusted certificate with mkcert
Modern browsers require valid certificates, which mkcert can create. Install mkcert, and then run this:
Some versions of Firefox (Developer Edition, Flatpak) may need some extra work, see also this issue.
Debian/Ubuntu
DDEV’s Debian and RPM packages work with apt and yum repositories and most variants that use them, including Windows WSL2:
# Add DDEV’s GPG key to your keyring
sudo sh -c 'echo ""'
sudo install -m 0755 -d /etc/apt/keyrings
curl -fsSL https://pkg.ddev.com/apt/gpg.key | gpg --dearmor | sudo tee /etc/apt/keyrings/ddev.gpg > /dev/null
sudo chmod a+r /etc/apt/keyrings/ddev.gpg

# Add DDEV releases to your package repository
sudo sh -c 'echo ""'
echo "deb [signed-by=/etc/apt/keyrings/ddev.gpg] https://pkg.ddev.com/apt/ * *" | sudo tee /etc/apt/sources.list.d/ddev.list >/dev/null

# Update package information and install DDEV
sudo sh -c 'echo ""'
sudo apt update && sudo apt install -y ddev
Need to remove a previously-installed variant?
If you previously used DDEV’s install script, you can remove that version:
If you previously installed DDEV with Homebrew, you can run brew unlink ddev to get rid of the Homebrew version.
Fedora, Red Hat, etc.
# Add DDEV releases to your package repository
sudo sh -c 'echo ""'
echo '[ddev]
name=ddev
baseurl=https://pkg.ddev.com/yum/
gpgcheck=0
enabled=1' | perl -p -e 's/^ +//' | sudo tee /etc/yum.repos.d/ddev.repo >/dev/null

# Install DDEV
sudo sh -c 'echo ""'
sudo dnf install --refresh ddev
Signed yum repository support will be added in the future.
Arch Linux
We maintain the ddev-bin package in AUR for Arch-based systems including Arch Linux, EndeavourOS and Manjaro. Install with yay or your AUR tool of choice.
Homebrew (AMD64 only)
Install Script
The install script is another option. It downloads, verifies, and sets up the ddev binary:
Windows
You can install DDEV on Windows three ways:
- Using WSL2 with Docker inside Recommended, best performance, most reliable
- Using WSL2 with Docker Desktop May require license, less reliable
- Installing directly on traditional Windows with an installer Legacy, slower performance
We strongly recommend using WSL2 for your Windows DDEV development environment. While its Linux experience may be new for some Windows users, it’s worth the performance benefit and common experience of working with Ubuntu and Bash.
Important Considerations for WSL2 and DDEV
- You must use WSL2, not WSL version 1. Use
wsl.exe -l -vto see the versions of the distros you are using they should be v2. - WSL2 is supported on Windows 10 and 11. All Windows 10/11 editions, including Windows 10 Home support WSL2.
-
WSL2 offers a faster, smoother experience.
It’s vastly more performant, and you’re less likely to have obscure Windows problems. -
Execute DDEV commands inside WSL2.
You’ll want to run DDEV commands inside Ubuntu, for example, and never on the Windows side in PowerShell or Git Bash. - Projects should live under the home directory of the Linux filesystem.
WSL2’s Linux filesystem (e.g./home/<your_username>) is much faster and has proper permissions, so keep your projects there and not in the slower Windows filesystem (/mnt/c). - Custom hostnames are managed via the Windows hosts file, not within WSL2.
DDEV attempts to manage custom hostnames via the Windows-side hosts file—usually atC:\Windows\system32\drivers\etc\hosts—and it can only do this if it’s installed on the Windows side. (DDEV inside WSL2 usesddev.exeon the Windows side as a proxy to update the Windows hosts file.) Ifddev.exe --versionshows the same version asddev --versionyou’re all set up. Otherwise, install DDEV on Windows usingchoco upgrade -y ddevor by downloading and running the Windows installer. (The WSL2 scripts below install DDEV on the Windows side, taking care of that for you.) If you frequently run into Windows UAC Escalation, you can calm it down by runninggsudo.exe cache onandgsudo.exe config CacheMode auto, see gsudo docs. - WSL2 is not the same as Docker Desktop’s WSL2 engine.
Using WSL2 to install and run DDEV is not the same as using Docker Desktop’s WSL2 engine, which itself runs in WSL2, but can serve applications running in both traditional Windows and inside WSL2.
The WSL2 install process involves:
- Installing Chocolatey package manager (optional).
- One time initialization of mkcert.
- Installing WSL2 and installing a distro like Ubuntu.
- Optionally installing Docker Desktop for Windows and enabling WSL2 integration with the distro (if you’re using the Docker Desktop approach).
- Installing DDEV inside your distro; this is normally done by running one of the two scripts below, but can be done manually step-by-step as well.
- Verify that your distro uses WSL version 2 with
wsl.exe -l -v.
WSL2 + Docker CE Inside Install Script
This technique is our favorite, as it uses the most reliable WSL2 Docker provider (docker-ce), which is also free and open-source.
This script prepares your default WSL2 Ubuntu distro and doesn’t require Docker Desktop, and you can run the script multiple times without breaking anything.
In all cases:
-
Install WSL2 with an Ubuntu distro.
-
Install WSL:
-
Reboot if required. (Usually required.)
-
Verify that you have an Ubuntu distro set as default by running
wsl.exe -l -v.
If you have WSL2 but not an Ubuntu distro, install one by runningwsl.exe --install Ubuntu. If this doesn’t work, see manual installation and troubleshooting. -
Verify that your Ubuntu default distro is WSL v2 using
wsl -l -v.
-
-
In an administrative PowerShell run this PowerShell script by executing:
Set-ExecutionPolicy Bypass -Scope Process -Force; [System.Net.ServicePointManager]::SecurityProtocol = [System.Net.ServicePointManager]::SecurityProtocol -bor 3072; iex ((New-Object System.Net.WebClient).DownloadString('https://raw.githubusercontent.com/ddev/ddev/master/scripts/install_ddev_wsl2_docker_inside.ps1')) -
In Windows Update Settings → Advanced Options enable Receive updates for other Microsoft products. You may want to occasionally run
wsl.exe --updateas well.
Now you can use the “Ubuntu” terminal app or Windows Terminal to access your Ubuntu distro, which has DDEV and Docker working inside it.
WSL2 + Docker Desktop Install Script
WSL2 with Docker Desktop is a less-favored choice because Docker Desktop may be lightly supported, and has many features not required for use with DDEV that do not add particular value. It is also not free software (although smaller organizations can use it free of charge) and it is not open-source.
The script here prepares your default WSL2 Ubuntu distro for use with Docker Desktop, and you can run the script multiple times without breaking anything.
In all cases:
-
Install WSL2 with an Ubuntu distro. On a system without WSL2, run:
-
Verify that you have an Ubuntu distro set as the default default with
wsl -l -v. -
If you have WSL2 but not an Ubuntu distro, install one with
wsl --install Ubuntu.
If that doesn’t work for you, see manual installation and troubleshooting.
If you prefer to use another Ubuntu distro, install it and set it as default. For example,
wsl --set-default Ubuntu-22.04. -
-
In Windows Update Settings → Advanced Options enable Receive updates for other Microsoft products. You may want to occasionally run
wsl.exe --updateas well. -
Install Docker Desktop. If you already have Chocolatey, run
choco install -y docker-desktop. Otherwise download Docker Desktop from Docker. - Start Docker Desktop. You should now be able to run
docker psin PowerShell or Git Bash. - In Docker Desktop → Settings → Resources → WSL2 Integration, verify that Docker Desktop is integrated with your distro.
-
In an administrative PowerShell run this PowerShell script by executing:
Set-ExecutionPolicy Bypass -Scope Process -Force; [System.Net.ServicePointManager]::SecurityProtocol = [System.Net.ServicePointManager]::SecurityProtocol -bor 3072;
iex ((New-Object System.Net.WebClient).DownloadString('https://raw.githubusercontent.com/ddev/ddev/master/scripts/install_ddev_wsl2_docker_desktop.ps1'))
Now you can use the “Ubuntu” terminal app or Windows Terminal to access your Ubuntu distro, which has DDEV and Docker Desktop integrated with it.
WSL2/Docker Desktop Manual Installation
You can manually step through the process the install script attempts to automate:
- Install Chocolatey:
- In an administrative PowerShell, run
choco install -y ddev mkcert. - In an administrative PowerShell, run
mkcert -installand follow the prompt to install the Certificate Authority. - In an administrative PowerShell, run
$env:CAROOT="$(mkcert -CAROOT)"; setx CAROOT $env:CAROOT; If ($Env:WSLENV -notlike "*CAROOT/up:*") { $env:WSLENV="CAROOT/up:$env:WSLENV"; setx WSLENV $Env:WSLENV }. This will set WSL2 to use the Certificate Authority installed on the Windows side. In some cases it takes a reboot to work correctly. - In administrative PowerShell, run
wsl --install. This will install WSL2 and Ubuntu for you. Reboot when this is done. - Docker Desktop for Windows: If you already have the latest Docker Desktop, configure it in the General Settings to use the WSL2-based engine. Otherwise install the latest Docker Desktop for Windows and select the WSL2-based engine (not legacy Hyper-V) when installing. Install with Chocolatey by running
choco install docker-desktop, or download the installer from desktop.docker.com. Start Docker. It may prompt you to log out and log in again, or reboot. - Go to Docker Desktop’s Settings → Resources → WSL integration → enable integration for your distro. Now
dockercommands will be available from within your WSL2 distro. - Double-check in PowerShell:
wsl -l -vshould show three distros, and your Ubuntu should be the default. All three should be WSL version 2. - Double-check in Ubuntu (or your distro):
echo $CAROOTshould show something like/mnt/c/Users/<you>/AppData/Local/mkcert - Check that Docker is working inside Ubuntu (or your distro) by running
docker ps. - Open the WSL2 terminal, for example
Ubuntufrom the Windows start menu. -
Install DDEV:
sudo install -m 0755 -d /etc/apt/keyrings curl -fsSL https://pkg.ddev.com/apt/gpg.key | gpg --dearmor | sudo tee /etc/apt/keyrings/ddev.gpg > /dev/null echo "deb [signed-by=/etc/apt/keyrings/ddev.gpg] https://pkg.ddev.com/apt/ * *" | sudo tee /etc/apt/sources.list.d/ddev.list >/dev/null sudo apt update && sudo apt install -y ddev -
In WSL2, run
mkcert -install.
You have now installed DDEV on WSL2. If you’re using WSL2 for DDEV, remember to run all ddev commands inside the WSL2 distro.
Path to certificates
If you get the prompt Installing to the system store is not yet supported on this Linux, you may need to add /usr/sbin to the $PATH so that /usr/sbin/update-ca-certificates can be found.
Traditional Windows
If you must use traditional Windows, then Docker Desktop is your only choice of a Docker provider. DDEV is supported in this configuration but it’s not as performant as the WSL2 options.
- We recommend using Chocolatey. Once installed, you can run
choco install ddev docker-desktop gitfrom an administrative shell. You can upgrade by runningddev poweroff && choco upgrade ddev. - Each DDEV release includes a Windows installer (
ddev_windows_installer.<version>.exe). After running that, you can open a new Git Bash, PowerShell, or cmd.exe window and start using DDEV.
Most people interact with DDEV on Windows using Git Bash, part of the Windows Git suite. Although DDEV does work with cmd.exe and PowerShell, it’s more at home in Bash. You can install Git Bash with Chocolatey by running choco install -y git.
Windows Firefox Trusted CA
The mkcert -install step on Windows isn’t enough for Firefox. You need to add the created root certificate authority to the security configuration yourself:
- Run
mkcert -install(you can use the shortcut from the Start Menu for that) - Run
mkcert -CAROOTto see the local folder used for the newly-created root certificate authority - Open Firefox Preferences (
about:preferences#privacy) - Enter “certificates” into the search box on the top
- Click View Certificates…
- Select Authorities tab
- Click to Import…
- Navigate to the folder where your root certificate authority was stored
- Select the
rootCA.pemfile - Click to Open
You should now see your CA under mkcert development CA.
Gitpod
Choose any of the following methods to launch your project with Gitpod:
-
Open any repository using Gitpod and run the following:
# Add DDEV’s GPG key to your keyring curl -fsSL https://pkg.ddev.com/apt/gpg.key | gpg --dearmor | sudo tee /etc/apt/keyrings/ddev.gpg > /dev/null # Add DDEV releases to your package repository echo "deb [signed-by=/etc/apt/keyrings/ddev.gpg] https://pkg.ddev.com/apt/ * *" | sudo tee /etc/apt/sources.list.d/ddev.list >/dev/null # Update package information and install DDEV sudo apt update && sudo apt install -y ddev- You can install your web app there, or import a database.
- You may want to implement one of the
ddev pullprovider integrations to pull from a hosting provider or an upstream source.
-
Use the ddev-gitpod-launcher form to launch a repository. You’ll provide a source repository and click a button to open a newly-established environment. You can specify a companion artifacts repository and automatically load
db.sql.gzandfiles.tgzfrom it. (More details in the repository’s README.) - Save the following link to your bookmark bar: Open in ddev-gitpod. It’s easiest to drag the link into your bookmarks. When you’re on a Git repository, click the bookmark to open it with DDEV in Gitpod. It does the same thing as the second option, but it works on non-Chrome browsers and you can use native browser keyboard shortcuts.
It can be complicated to get private databases and files into Gitpod, so in addition to the launchers, the git provider example demonstrates pulling a database and files without complex setup or permissions. This was created explicitly for Gitpod integration, because in Gitpod you typically already have access to private Git repositories, which are a fine place to put a starter database and files. Although ddev-gitpod-launcher and the web extension provide the capability, you may want to integrate a Git provider—or one of the other providers—for each project.
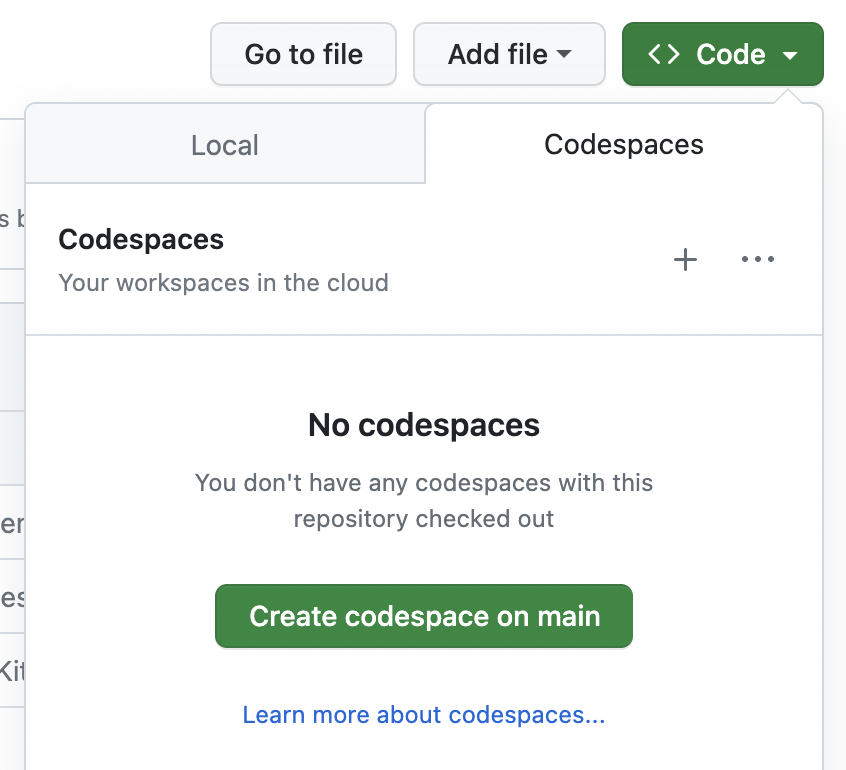
GitHub Codespaces
You can use DDEV in remote GitHub Codespaces without having to run Docker locally; you only need a browser and an internet connection.
Start by creating a .devcontainer/devcontainer.json file in your GitHub repository:
{
  "image": "mcr.microsoft.com/devcontainers/universal:2",
  "features": {
    "ghcr.io/ddev/ddev/install-ddev:latest": {}
  },
}
Launch your repository in Codespaces:
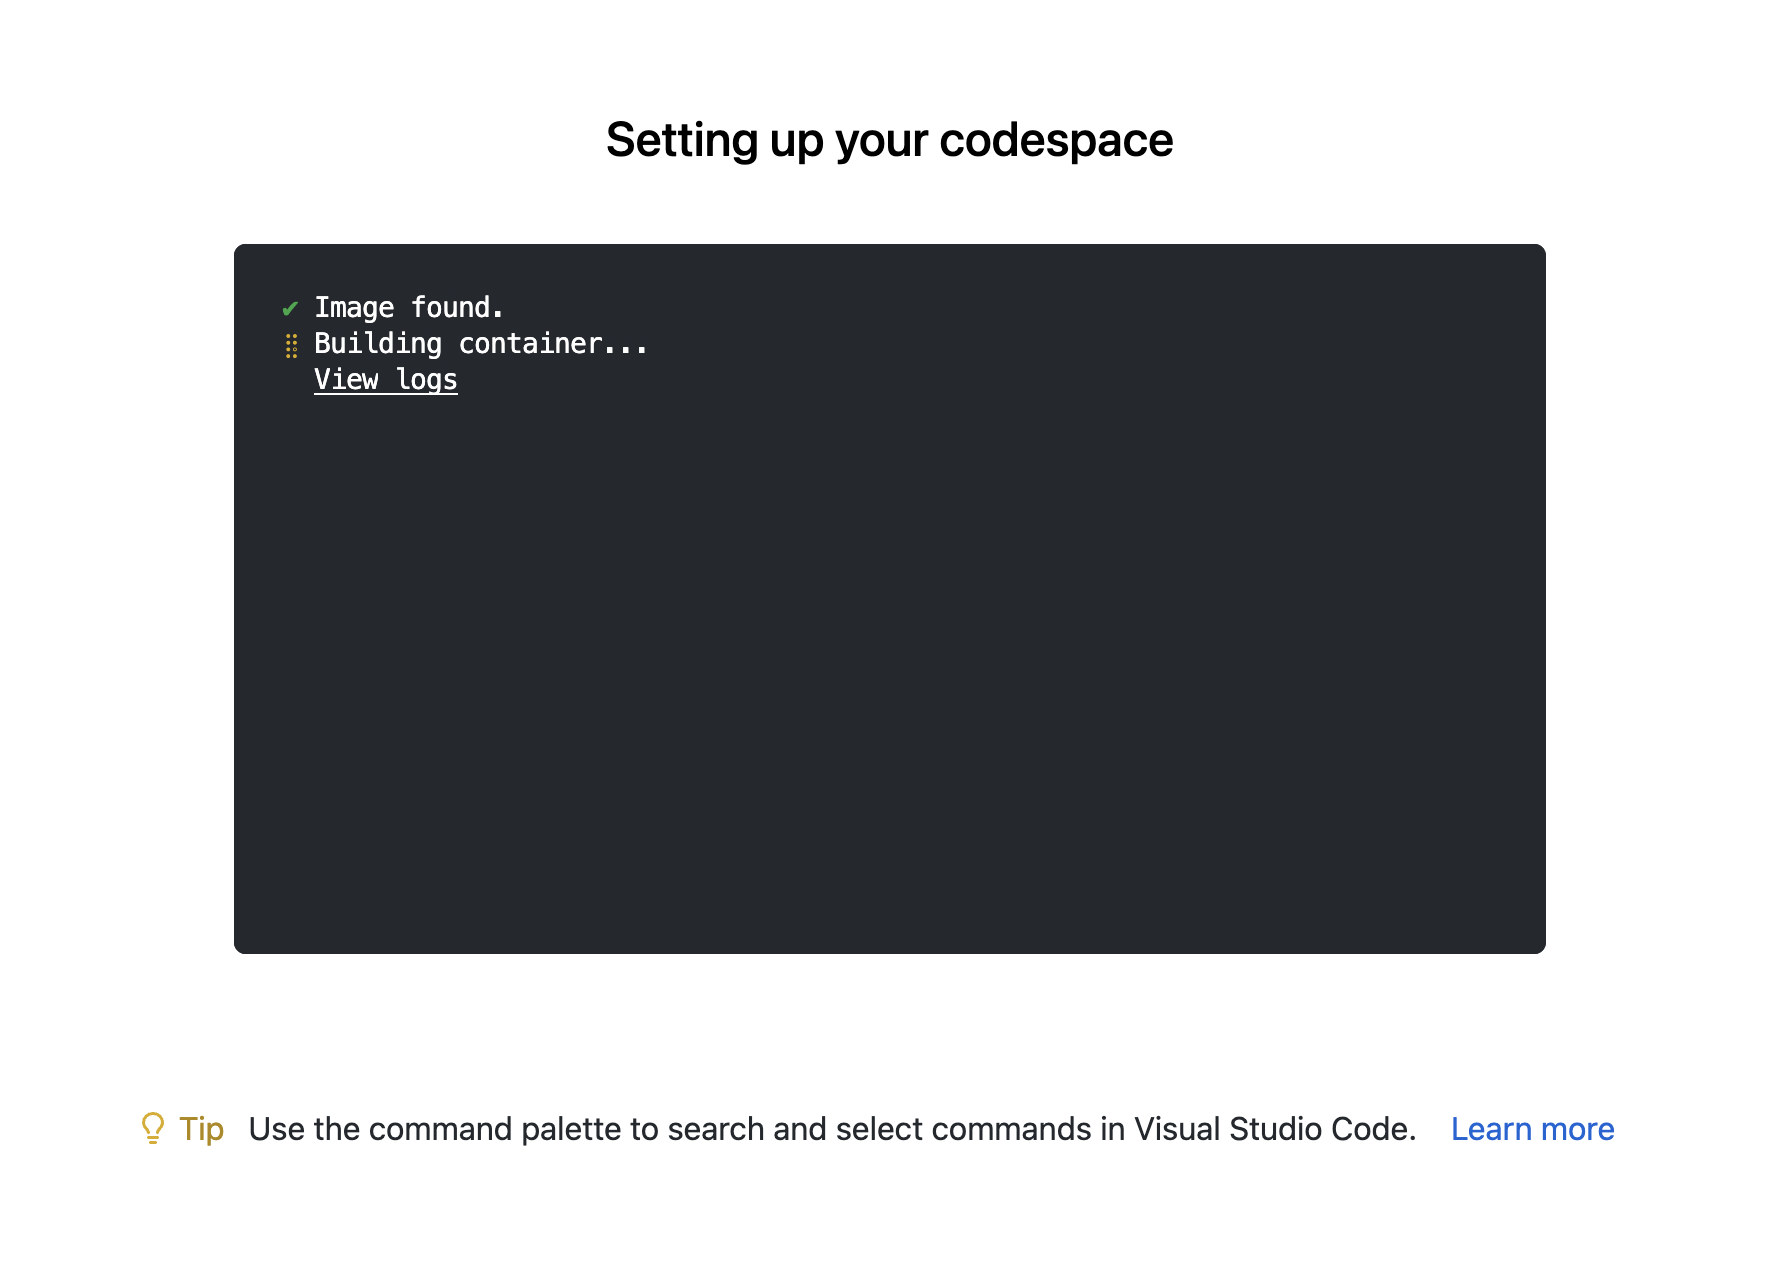
DDEV is now available within your new codespace instance:
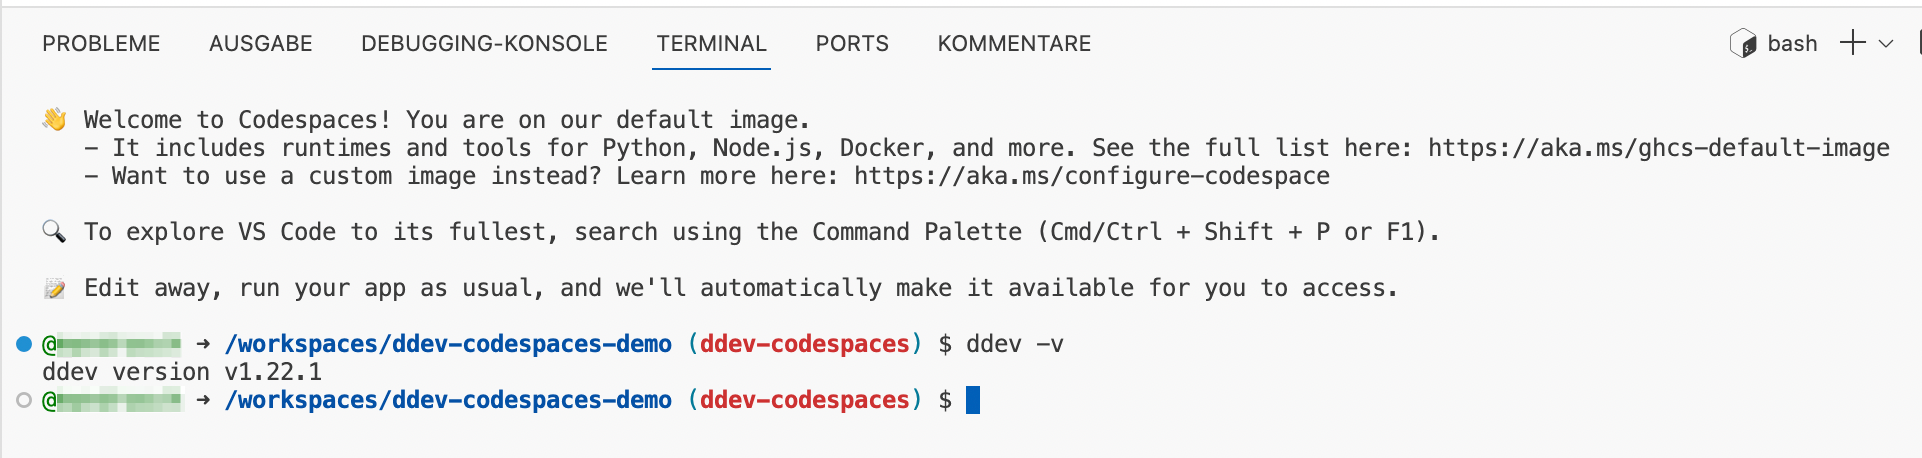
Run ddev config to start a new blank project - or install a CMS.
Run ddev start if there is already a configured DDEV project in your repository.
Troubleshooting:
If there are errors after restarting a codespace, use ddev restart or ddev poweroff.
You can also use the commands
- “Codespaces: Rebuild container”
- “Codespaces: Full rebuild container” (Beware: database will be deleted)
via the Visual Studio Code Command Palette:
- ⌘ + SHIFT + P on a Mac
- CTRL + SHIFT + P on Windows/Linux
- from the Application Menu, click View > Command Palette (Firefox)
If you need DDEV-specific assistance or have further questions, see support.
Your updated devcontainer.json file may differ depending on your project, but you should have install-ddev in the features section.
Normal Linux installation also works
You can also install DDEV as if it were on any normal Linux installation.
Docker integration
DDEV in Codespaces relies on docker-in-docker, which is installed by default when you use the image "mcr.microsoft.com/devcontainers/universal:2". Please be aware: GitHub Codespaces and its Docker-integration (docker-in-docker) are relatively new. See devcontainers/features for general support and issues regarding Docker-support.
DDEV’s router is not used
Since Codespaces handles all the routing, the internal DDEV router will not be used on Codespaces. Therefore config settings like web_extra_exposed_ports will have no effect.
You can expose ports via the ports setting, which is usually not recommended if you work locally due to port conflicts. But you can load these additional Docker compose files only when Codespaces is detected. See Defining Additional Services for more information.
Default environment variables
Codespace instances already provide some default environment values. You can inherit and inject them in your .ddev/config.yaml:
Advanced usage via devcontainer.json
A lot more customization is possible via the devcontainer.json-configuration. You can install Visual Studio Code extensions by default or run commands automatically.
postCreateCommand
The postCreateCommand lets you run commands automatically when a new codespace is launched. DDEV commands are available here.
The event is triggered on: fresh creation, rebuilds and full rebuilds. ddev poweroff is used in this example to avoid errors on rebuilds since some Docker containers are kept.
You usually want to use a separate bash script to do this, as docker might not yet be available when the command starts to run.
{
    "image": "mcr.microsoft.com/devcontainers/universal:2",
    "features": {
        "ghcr.io/ddev/ddev/install-ddev:latest": {}
    },
    "portsAttributes": {
        "3306": {
            "label": "database"
        },
        "8027": {
            "label": "mailpit"
        },
        "8080": {
            "label": "web http"
        },
        "8443": {
            "label": "web https"
        }
    },
    "postCreateCommand": "chmod +x .devcontainer/setup_project.sh && .devcontainer/setup_project.sh"
}
#!/bin/bash
set -ex

wait_for_docker() {
  while true; do
    docker ps > /dev/null 2>&1 && break
    sleep 1
  done
  echo "Docker is ready."
}

wait_for_docker

# download images beforehand, optional
ddev debug download-images

# avoid errors on rebuilds
ddev poweroff

# start ddev project automatically
ddev start -y

# further automated install / setup steps, e.g.
ddev composer install
To check for errors during the postCreateCommand action, use the command
- “Codespaces: View creation log”
via the Visual Studio Code Command Palette:
- ⌘ + SHIFT + P on a Mac
- CTRL + SHIFT + P on Windows/Linux
- from the Application Menu, click View > Command Palette (Firefox)

Manual
DDEV is a single executable, so installation on any OS is a matter of copying the ddev binary for your architecture into the appropriate system path on your machine.
- Download and extract the latest DDEV release for your architecture.
- Move
ddevto/usr/local/binwithmv ddev /usr/local/bin/(may requiresudo), or another directory in your$PATHas preferred. - Run
ddevto test your installation. You should see DDEV’s command usage output. -
As a one-time initialization, run
mkcert -install, which may require yoursudopassword.If you don’t have
mkcertinstalled, download the latest release for your architecture andsudo mv <downloaded_file> /usr/local/bin/mkcert && sudo chmod +x /usr/local/bin/mkcert.